Imagine that you are creating a project with python, and you need to import a package which is not the same version as other project, what should we in this situation? Maybe creating a virtual environment for this project is a good choice. In this blog, I’ll talk about virtual environment with the following points:
- Why we create a virtual environment?
- How to create a virtual environment by Python?
- How to use virtual environment in Jupyter Notebook?
Why we create a virtual environment?
In case of what I mentioned at the beginning, the virtual environment allows you to use a certain version of a module for one project and another version for another project: if you install the module system-wide and don’t use venv, then you can only use one version of the module.
In a word, virtual environment is able to ensure your modules’ version for a python project.
How to create a virtual environment by Python?
Before creating a virtual environment by Python, you should make sure that you
have installed pip. For creating the virtual environment, we firstly install
virtualenv module:
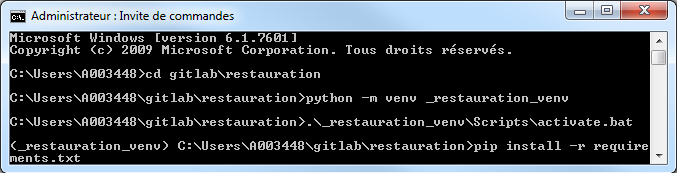
pip install --user --upgrade virtualenvNow you can create a virtual environment in the corresponding directory by typing:
python -m venv _venvname

_venvname can be replaced by the name you want for your venv. In my example,
the name of venv is “_restauration_venv”.
After creating your venv, you can activate it with:
.\_venvname\Scripts\activate.batand install the modules you need:
pip install -r requirements.txt
Before leaving, you need to deactivate the venv:
.\_venvname\Scripts\deactivate.bat

How to use virtual environment in Jupyter Notebook?
If you want to use virtual environment in Jupyter Notebook, you need to add a
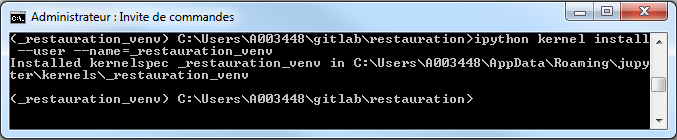
kernel with it. First, activate your virtual environment; then install
ipykernel:
pip install --user ipykernelNow you can add your venv to Jupyter Notebook:
ipython kernel install --user --name=_venvname
Next, you can choose your kernel as following:
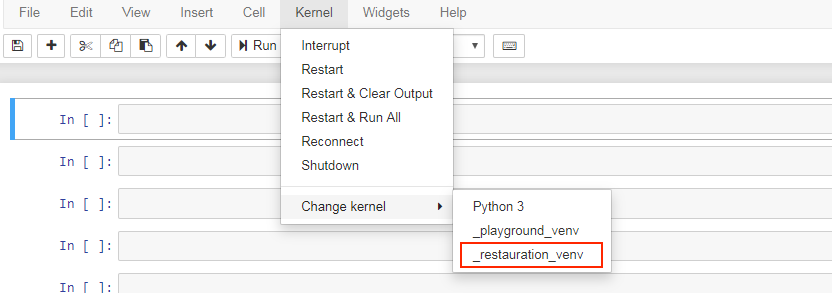
As soon as you choose, the kernel will update at the right top corner:

Conclusion
In this blog, I talked about why we create a virtual environment, how to create a virtual environment by Python and how to use virtual environment in Jupyter Notebook. Hope it’s useful for you.
References
- Angelo Basile, “Using jupyter notebooks with a virtual environment”, anbasile.github.io. [Online]. Available: https://anbasile.github.io/programming/2017/06/25/jupyter-venv/
- Nikolai Janakiev, “Using Virtual Environments in Jupyter Notebook and Python”, Parametric Thoughts. [Online]. Available: https://janakiev.com/til/jupyter-virtual-envs/
- PIRO4D, “Virtual city utopia architecture”, pixabay.com. [Online]. Available: https://pixabay.com/photos/virtual-city-utopia-architecture-1589431/