This blog specifies how to automate python scripts to run by GitLab CI. In the following, I will talk about each element of the configuration with “.gitlab-ci.yml”, manage environments with anaconda and “environment.yml”, and settings on GitLab.
Requirements
Before all, I would like to specify my working environment.
- OS: Debian 8
- GitLab Community Edition 10.8.0 (GitLab Installation)
- GitLab Runner (GitLab Runner Installation)
- Python 3.6.4
Project structure
$ tree
.
├── .gitlab-ci.yml
├── environment.yml
└── weekly_job.py
Using GitLab CI to configure your jobs
.gitlab-ci.yml is used by GitLab CI to manage your project’s jobs. It is
placed in the root of your repository and contains definitions of how your
project should be built. On any push to your repository, GitLab will look for
the .gitlab-ci.yml file and start jobs on CI according to the contents of
the file, for that commit.
Following is one example:
stages:
  - test
  - report

tests:
  image: "XXXX/miniconda-teradata-centos:latest"
  stage: test
  script:
    - pip install --upgrade pip
    - pip install -r requirements.txt
    - python -m unittest discover --verbose . "*_test.py"
  tags:
    - docker

weekly_job:
  image: "XXXX/miniconda-teradata-centos:latest"
  stage: report
  script:
    - conda env create -f jobs/environment.yml -q
    - source activate weekly_job
    - python jobs/weekly_job.py
  only:
    variables:
      - $weekly_job == "yes"
    refs:
      - schedules
      - master
  tags:
    - docker
In this example, there are several parts: stages, image, stage, script,
only, tags. I’ll introduce them one by one.
stages
stages is used to define stages that can be used by jobs and is defined
globally.
The specification of stages allows for having flexible multi stage pipelines. The ordering of elements in stages defines the ordering of jobs’ execution:
- Jobs of the same stage are run in parallel.
- Jobs of the next stage are run after the jobs from the previous stage complete successfully.
In the example, we have 2 stages ‘test’ and ‘report’. The jobs of stage ‘test’ will run before running the jobs of stage ‘report’.
image
This allows to specify a custom Docker image that can be used for time of the job. In our case, we need to use connect Teradata which officially supports only CentOS and RHEL Linux distributions, so we built upon Jeremy Marshall’s docker-teradata-client container and moble’s miniconda-centos container.
If the configuration interests you, more information here.
stage
stage is defined per-job and relies on stages which is defined globally. It
allows to group jobs into different stages, and jobs of the same stage are
executed in parallel.
In the example, the job in ‘tests’ corresponds the stage ‘test’, the job in ‘weekly_job’ corresponds the stage ‘report’.
script
script is the only required keyword that a job needs. It’s a shell script
which is executed by the CI.
  script:
    - pip install --upgrade pip
    - pip install -r requirements.txt
    - python -m unittest discover --verbose . "*_test.py"
The scripts in ‘tests’ update pip, install packages in requirements.txt with pip, and discover unit tests that ends with ‘_test.py’.
  script:
    - conda env create -f jobs/environment.yml -q
    - source activate weekly_job
    - python jobs/weekly_job.py
We created a conda environment quietly from file jobs/environment.yml (I’ll talk about this file in the next part), then switching to the new environment which is defined by the file, and run python script jobs/weekly_job.py by python.
only
only defines the names of branches and tags for which the job will run.
There are a few rules that apply to the usage of job policy:
onlyis inclusive. If only is defined in a job specification, the ref is filtered by only.onlyallows the use of regular expressions.onlyallows to specify a repository path to filter jobs for forks.
In addition, only allows the use of special keywords. For example, variables
keyword is used to define variables expressions, in other words you can use
predefined variables / project / group or environment-scoped variables to define
an expression GitLab is going to evaluate in order to decide whether a job
should be created or not; using refs to specify that a branch is pushed and
scheduled pipelines.
  only:
    variables:
      - $weekly_job == "yes"
    refs:
      - schedules
      - master
In the example, the job only runs when it satisfies the following conditions:
- value of variable $weekly_job is “yes”
(use
%variable%in windows batch and$env:variablein PowerShell) - following the scheduled pipelines
- script is on the master branch
tags
tags is used to select specific Runners from the list of all Runners that are
allowed to run this project.
Managing environments
With conda, you can create, export, list, remove and update environments that have different versions of Python and/or packages installed in them. Switching or moving between environments is called activating the environment. You can also share an environment file.
Creating an environment from an environment.yml file
You can create an environment file manually to share with others.
name: weekly_job
dependencies:
  - numpy
  - openpyxl
  - pandas
  - teradata==15.10.0.21
  - pip:
    - datetime
    - mailer == 0.8.1
An environment.yml file should specify environment’s name with name, and
dependable packages with dependencies.
GitLab settings
Configuring GitLab CI
A Runner can be specific to a certain project or serve any project in GitLab CI. A Runner that serves all projects is called a shared Runner. You can find more information about configuration here.
Before running, don’t forget to go to Settings > CI/CD > Runners settings to active your runner.
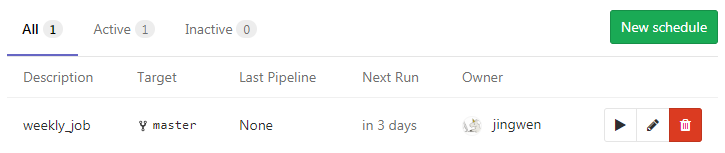
Pipeline Schedules
Pipeline schedules can be used to run a pipeline at specific intervals, for example every Monday at 7:00 for a certain branch.
In order to schedule a pipeline:
- Navigate to your project’s CI / CD > Schedules and click the New Schedule button.
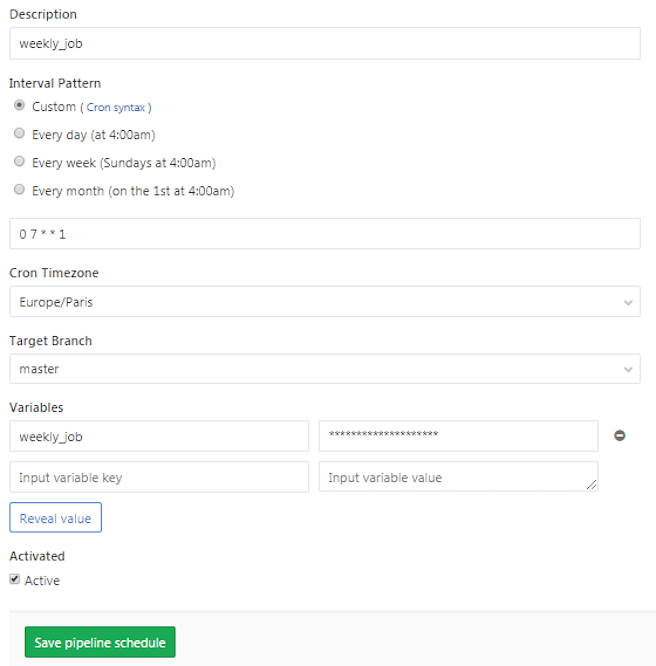
- Fill in the form
- Hit Save pipeline schedule for the changes to take effect.
Moreover, You can pass any number of arbitrary variables and they will be available in GitLab CI so that they can be used in your .GitLab-ci.yml file.